Showing posts with label magnets. Show all posts

Wednesday, August 5, 2015

Win It Wednesday, August 5, 2015

Welcome to another WIN IT WEDNESDAY! This week our Win It Wednesday prize is all the supplies to create a Friends Photo Memo Board. 


Just Comment and Like this Facebook post to enter to win. A random winner will be announced Thursday, August 6. Facebook has complete release by each entrant or participant. (This promotion is in no way sponsored, endorsed or administered by, or associated with, Facebook.) Winner will be announced on our Crafts Direct Facebook page and has 14 days to claim prize (Winner must pick up in-store or provide shipping address) before it is considered void.

U.S. Residents only
‪

Friday, December 6, 2013

25 Days of Christmas: Day 6


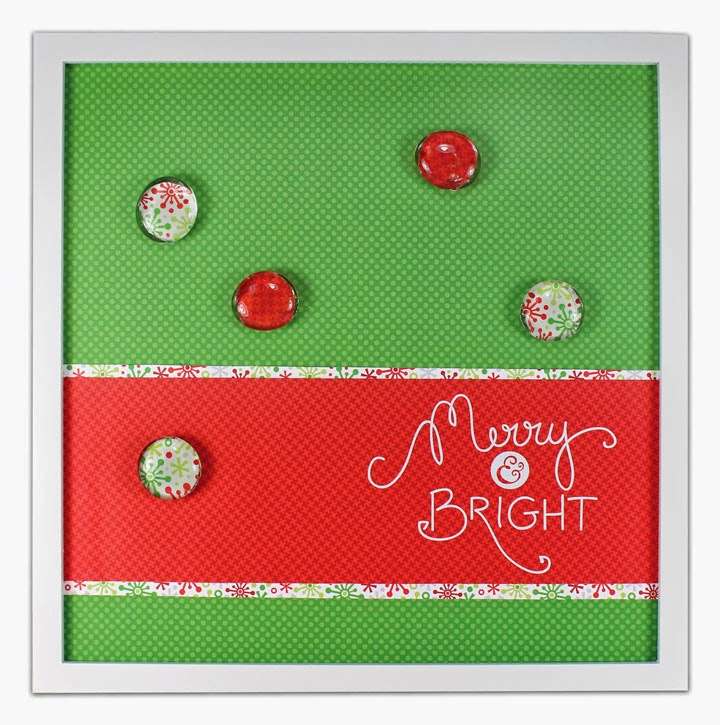
Day 6: Memo Boards

With all that you have to keep track of and organized this time of year a memo board is something that will always come in handy. Why not create a fun and festive place to keep all your notes and to-dos that is not only useful but also decorative as well!

All you need is a few supplies and you can turn one of our 12x12 frames into a magnet memo board that you may not want to cover up with notes after all.


Wednesday, October 2, 2013

Project Ideas: Doodlebug Halloween Parade.


Somehow we have arrived in October...which of course brings with it Halloween and all the fun Halloween crafting projects to create too!

Today I wanted to share a couple projects that our designer Sarah Lynn created using the Doodlebug Halloween Parade line.

These pillow boxes would make great party favors or packages for special treat or treaters at Halloween. You can find project instructions for the Pillow Boxes HERE.


She also used the line to create this magnetic board and coordinating magnets - a great decor piece and of course useful to hold notes or photos throughout the month too! You can find project instructions for the Magnetic Board HERE.


Friday, September 13, 2013

Project Ideas: 12x12 SPC Frames.


Over the next few weeks I'm excited to share with you some new project ideas our team has recently created. Even more exciting is that all of these projects will be using pieces that are currently ON SALE as part of our Anniversary Sale Ad!

Today I have SEVEN project ideas to show with you that all use our 12x12 SPC Frames. Currently the frames are on sale for only $4.98 each and come in brown, white and black colors. You can find the frames as well as the projects shown below on a front endcap in our Paints & Basics department.


Thursday, May 23, 2013

Project Ideas: Take Note Magnetic Board


Just a quick project idea to share with you today...but one that I absolutely LOVE. Using one of our magnetic boards along with some paper and sticker embellishments from the Doodlebug Take Note line Melissa created this adorable magnetic organizer for us! I especially love the pushpin magnets she created using glass marbles so you can attach any notes or photos right to the little daily "clipboards".


If you would like to create your own magnetic board we have the list of supplies and project instructions on our website HERE.

Wednesday, May 22, 2013

Project Ideas: Fabric Magnetic Board


Today I wanted to share this fun Fabric Covered Magnetic Board project with you! I love this project because you can really create the piece to any theme you wish since you are using fabrics. Also like many of us, you might even have some left over fabric from a previous project or even a favorite fabric that you can't get yourself to use - and this project would be perfect becuase you will get to enjoy it daily!

All you need to do is pick up (or reuse a frame you already have) a open backed frame, adhere some fabric to a metal sheet and place it into the frame. We also crafted some magnets using buttons, twine and small magents, but agin if you have magnets already you can just use them on your new board!

You can find a project sheet with a list of the products we used on this piece as well as detailed instructions to make your own HERE.


Monday, April 22, 2013

Project Ideas: Metal Trees

Hi Everyone! I hope you all had a wonderful weekend - and have a great Monday too! Today I wanted to share with you a couple of new project ideas we have created using two different styles of metal trees we have available in store.

Both come finished in a black color - but can be altered in numerous ways - and are obviously great for posting photos and notes and can be used with a variety of magnet options too!

You can find a project sheet with detailed instructions for each project by clicking the project names below.

Metal Family Tree


Monday, March 4, 2013

Project Ideas: Magnetic Boards.

The thing I love about magnetic boards is how functional they can be! From displaying notes to photos - things can be easily added or removed and they always seem to come in handy when you need a place to put something (just think of the front of your refrigerator!). However, if you are like me adding more to your refrigerator door isn't an option - or maybe you would just like a place to put these types of items instead of the refrigerator - or even better you just want an excuse to make something cute and crafty...if any of these apply- I have some great projects to share with you today!

The first magnetic board is a smaller board (10x10") and comes as a stand up piece. For this project we covered the board with pattern paper, embellished with a few pieces and then made our own magnets using small magnets, glossy accents and a button embellishment pack. A project sheet for this sample can be found HERE.

The second piece is a larger piece - would be great for a narrow wall - and we added some vinyl and pattern paper. We also created magnets for this piece with the layered flower embellishments which we adhered to magnets using Glossy Accents. A project sheet for this project can be found HERE.


Wednesday, December 12, 2012

25 Days of Christmas 2012 - Day 12


Day 12: Wire Trees 

Today I have a couple fun project ideas to share with you using our decorative wire trees. These pieces come as just the black wire base, but can easily be altered to create a great decor piece for your home.

For the first tree we added a little color and sparkle to the tree by using Glitter Blast spray paint - for the tree we used a green color and then the star a yellow. Then we simply added a few glitter dot embellishments to the tree and a ribbon around the trunk. We added a few photos to this sample, but it could also be used as a Christmas card holder as well.


For the second sample project we put together we actually used the base of the tree to create an advent countdown calendar. Using pattern paper, number stickers, and glass marbles we made magnets with the numbers 1-12 on them. Then we just wrote some daily activities or events on pieces of pattern paper and placed them on the tree using the magnets. Such a fun way to countdown to Christmas!


Monday, December 10, 2012

25 Days of Christmas 2012 - Day 10


Day 10: Magnetic Boards

If you're like me December brings lots of lists, reminders, photos, etc. To help you keep track of all the 'stuff' that comes along with December why not create one of these decorated magnetic boards. They are the perfect size for a desk or kitchen counter and can be decorated with paper, vinyl, stickers, etc.  You can also easily create customized magnets by adding a magnet to the back of a button (as we did with the snowflake button embellishments below) or a decorated glass tile. A cute board will definitely make keeping track of all your 'to-do's a little more fun!


Thursday, September 13, 2012

Saturday Events.

In honor of our 22nd Anniversary Celebration, this month we are offering free Make & Takes and product samples each Saturday from 1-3pm. This Saturday (Sept. 15th) we will have two adorable projects to create and will be sampling our Wind & Willow dips as well.
 
The first project that we will be offering is the cute Halloween Card you see below. Join Heather at our Paper Crafts demo counter between 1-3 to make one for yourself!


At our Beads & Basics demo counter, Brianna will be helping your create this fun Jack-o-Lantern magnet, by embellishing a simple glass marble!


In addition to the projects you can create on Saturday afternoon, you will also be able to sample three flavors of our Wind & Willow dip mixes in our Kitchen display room at the front of the store. The flavors we will be sampling are Chipotle Cheddar, Back at the Ranch and Cheesy Bacon. This is a great opportunity to give them a try and find a favorite (or favorites) before your holiday entertaining begins in a few months.


Hope to see you here from 1-3pm on Saturday!!

Tuesday, August 28, 2012

Back to School.


We are down to only one week before the start of school! Are you ready?

I have the school clothes pretty much taken care of and the supplies all set to bring to open house - but I still have a few more projects I need to get done this week. Specifically, I need to put together a bulletin or magnetic board to keep us all on track as we get back into the swing of a new schedule. And I also plan on making a little something for each of my kids teachers for them to bring on the first day. If you are looking for ideas for either of these types of projects, today I have some fun project ideas to share with you!

First up, a few organizer board ideas. We created this bulletin board by painting one of our 12x12 frames and swapping out the glass with a 12x12 piece of cork board. Then we embellished with pattern paper from the We R Memory Keepers Hall Pass line and even made our own pins by gluing thumb tacks to the back of metal tag embellishments that coordinated with the paper line.


If you would prefer a magnetic board, Kristine created this adorable magnet board by placing a 12x12 metal sheet into a frame. She covered the metal with pattern paper and then embellished using paper from the My Mind's Eye 6x6 School themed paper pad. She created matching magnets by using glossy accents to adhere pattern paper (from the same line) to the backside of glass tiles and then adhering magnets to the back of the paper.


Here is another take on an organizer board. This board was created on a canvas and was altered by using vinyl, chalkboard paint and pattern paper. I love the addition of the decorated clips at the bottom of the canvas!


As I mentioned it is really easy to create your own magnets by adhering pattern paper to the backside of a glass tile using glossy accents and then gluing a magnet to the back of the pattern paper. Here are a few more magnet ideas that you could use for your own magnet board, or could be given as a teacher gift as well.

For these apple magnets, we punched circles of red cardstock and glued them to the back of the glass tile. Then we hand cut the stems from brown cardstock and leaves from green pattern paper and glued them to the front.


For these magnets, it is even more simple - we just found images that fit the tiles on pattern paper and punched them out and glued them on. These would be great to use just on a refrigerator to hold school papers or special pieces that are brought home!


Next, I wanted to share a few project ideas that would be perfect to create for those special teachers on the first day of school!

We created this apple treat box, by painting one of our paper mache boxes red, and then simply gluing this wood apple onto the front (which is already cut and painted). To add a bit more decoration we cut this "Back to School" tag from a piece of pattern paper and then attached it with a piece of red and white bakers twine. This would be great to fill with some treats or a few small school supplies - or even with a batch of apple magnets I shared above!  


Another idea is to embellish and fill one of our clear tubes with something fun for the teacher. We created a few sample ideas below:


 Or you could always fill up a Mason Jar with something fun too:


And one final idea, a teacher supply box. For this project we painted this divided wood box that you can find in our Beads & Basics department and then embellished with pieces from the We R Memory Keepers Hall Pass line and some ruler ribbon. We filled it with some fun office/school supplies, but of course you could also fill it with some treats for the teacher too.


 *To see some of our school themed projects from the past and other fun ideas we found online be sure to check out our Back to School Board on Pinterest too!

Have you created any organizer boards or teacher gifts to get ready for school? I would love to share them if you have!

Wednesday, January 11, 2012

New Memo & Calendar Boards.

Today I wanted to share with you a few new samples of our memo/calendar boards that Sarah Lynn created.

If you happen to have one that was decorated with a Christmas theme - now is the perfect time to simply swap out the paper and embellishments and create a new look for the upcoming season/month. And if you don't have one already - this is a really easy, fun way to get crafty and also a useful piece to add to your home!


Thursday, December 8, 2011

25 Days of Christmas 2011: Day 8


Day 8: Memo and Magnetic Boards

A fun way to add some practical holiday decor to your home or office is with one of our Memo or Magnetic boards. Decorated as a calendar or a holiday board they create a perfect place to keep track of your holiday events, hang Christmas cards, or display holiday photos. The best part is once you have the frame created you can easily change out the embellishments and paper to create a new look for the next month or season. Here are few that we created for December and January: