Showing posts with label Magnetic Boards. Show all posts

Friday, December 6, 2013

25 Days of Christmas: Day 6


Day 6: Memo Boards

With all that you have to keep track of and organized this time of year a memo board is something that will always come in handy. Why not create a fun and festive place to keep all your notes and to-dos that is not only useful but also decorative as well!

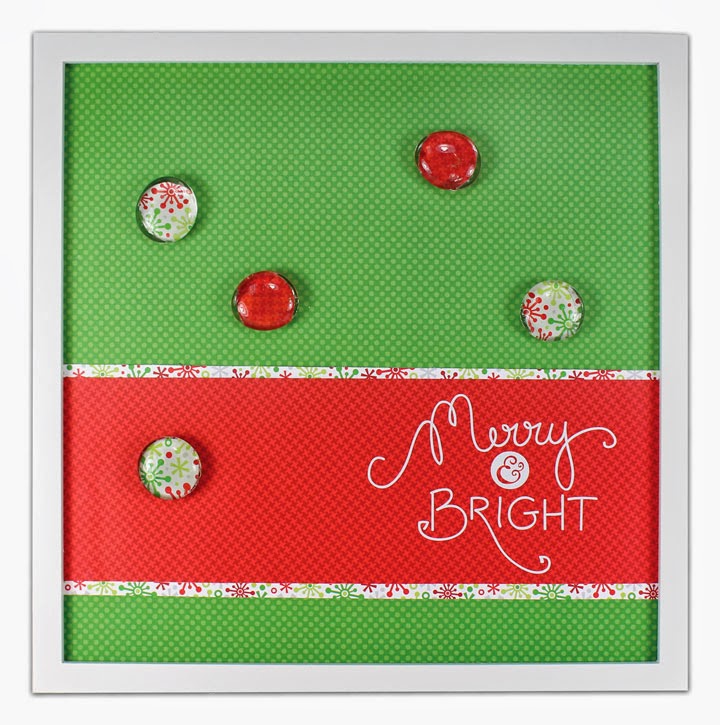
All you need is a few supplies and you can turn one of our 12x12 frames into a magnet memo board that you may not want to cover up with notes after all.


Wednesday, October 2, 2013

Project Ideas: Doodlebug Halloween Parade.


Somehow we have arrived in October...which of course brings with it Halloween and all the fun Halloween crafting projects to create too!

Today I wanted to share a couple projects that our designer Sarah Lynn created using the Doodlebug Halloween Parade line.

These pillow boxes would make great party favors or packages for special treat or treaters at Halloween. You can find project instructions for the Pillow Boxes HERE.


She also used the line to create this magnetic board and coordinating magnets - a great decor piece and of course useful to hold notes or photos throughout the month too! You can find project instructions for the Magnetic Board HERE.


Friday, July 12, 2013

Project Ideas: Magnetic Boards


Magnetic boards are one of my favorites! 

As someone who always has little notes everywhere, extra photos, and other bits and pieces on my desk and kitchen counter I love using magnetic boards to give everything a "home" - plus as you will see with the ideas I have to share with you today the added bonus is that you can create a magnetic board that is not only functional but also decorative too!

Melissa did an awesome job creating all three of these Magnetic Boards, but I have to say this first one is my favorite and it has been added to my project list to re-create for my own desk!

The board itself is 10x10" and has a stand attached, making it perfect for a desk or counter. The Basic Grey Kneehighs line is perfect and the little bottle caps adorable! You can find a project sheet for the Hello Beautiful Magnetic Board here.


For this Chalkboard Magnetic Board, we first covered the magnetic board with chalkboard paint and then added the various embellishments to the piece. Now it can be used to write notes and with magnets too!


The last magnetic board was decorated and embellished using pieces from the My Mind's Eye: Cambridge Court line. The circle pieces are actually magnetic frames that were covered with pattern paper. This piece would be great to display some favorite photos! You can find a project sheet for this magnetic board HERE.


Monday, June 24, 2013

Washi Week: Monday.


Hello. Happy Monday. And welcome to Washi Week!

I'm very excited to share some fun project ideas with you this week - which all use Washi Tape!

You can find all our Washi Tape in aisle 15 of our Paper Crafts department. Here you can also find the display below - which has most of our Washi Tape projects and project sheets for each of them too. Of course these are just a few project ideas you can use Washi on - it is also great to use with scrapbooking and card making and you can also find additional ideas on project ideas on our Washi Tape Pinterest Board.


Today I have a few memo/display board projects to share with you. 
 First, the adorable Best Friends magnetic board. A simple white magnetic board with Washi Tape added across the piece and then alpha stickers to add the title. The pink metal circle is perfect for a photo and already has magnets attached so you can easily display it on the memo board. You can find a project sheet for this project HERE.


Following the same basic idea of horizontal stripes with the Washi, you could also easily create this cute decorated clipboard.


And finally, using a metal sign, some Washi Tape and some clothespins, you can also create this little Washi Clothespin Note Center. You can find a project sheet for this project HERE.


Thursday, May 23, 2013

Project Ideas: Take Note Magnetic Board


Just a quick project idea to share with you today...but one that I absolutely LOVE. Using one of our magnetic boards along with some paper and sticker embellishments from the Doodlebug Take Note line Melissa created this adorable magnetic organizer for us! I especially love the pushpin magnets she created using glass marbles so you can attach any notes or photos right to the little daily "clipboards".


If you would like to create your own magnetic board we have the list of supplies and project instructions on our website HERE.

Wednesday, May 22, 2013

Project Ideas: Fabric Magnetic Board


Today I wanted to share this fun Fabric Covered Magnetic Board project with you! I love this project because you can really create the piece to any theme you wish since you are using fabrics. Also like many of us, you might even have some left over fabric from a previous project or even a favorite fabric that you can't get yourself to use - and this project would be perfect becuase you will get to enjoy it daily!

All you need to do is pick up (or reuse a frame you already have) a open backed frame, adhere some fabric to a metal sheet and place it into the frame. We also crafted some magnets using buttons, twine and small magents, but agin if you have magnets already you can just use them on your new board!

You can find a project sheet with a list of the products we used on this piece as well as detailed instructions to make your own HERE.


Monday, March 4, 2013

Project Ideas: Magnetic Boards.

The thing I love about magnetic boards is how functional they can be! From displaying notes to photos - things can be easily added or removed and they always seem to come in handy when you need a place to put something (just think of the front of your refrigerator!). However, if you are like me adding more to your refrigerator door isn't an option - or maybe you would just like a place to put these types of items instead of the refrigerator - or even better you just want an excuse to make something cute and crafty...if any of these apply- I have some great projects to share with you today!

The first magnetic board is a smaller board (10x10") and comes as a stand up piece. For this project we covered the board with pattern paper, embellished with a few pieces and then made our own magnets using small magnets, glossy accents and a button embellishment pack. A project sheet for this sample can be found HERE.

The second piece is a larger piece - would be great for a narrow wall - and we added some vinyl and pattern paper. We also created magnets for this piece with the layered flower embellishments which we adhered to magnets using Glossy Accents. A project sheet for this project can be found HERE.


Tuesday, February 19, 2013

Project Ideas: Memo Boards

I've shared different Memo Board project ideas plenty times on the blog before - and today I wanted to share with you our latest samples. The best part about these pieces is that once you have the main components (the frame, the bulletin board or magnetic board, and if you are making a calendar the overlay) - by just changing out the paper and embellishments you use you can create an entire new look for each month or season (or just to change it up!).

Below you will find six samples we recently created using the Memo Board base for the spring months:


Monday, December 10, 2012

25 Days of Christmas 2012 - Day 10


Day 10: Magnetic Boards

If you're like me December brings lots of lists, reminders, photos, etc. To help you keep track of all the 'stuff' that comes along with December why not create one of these decorated magnetic boards. They are the perfect size for a desk or kitchen counter and can be decorated with paper, vinyl, stickers, etc.  You can also easily create customized magnets by adding a magnet to the back of a button (as we did with the snowflake button embellishments below) or a decorated glass tile. A cute board will definitely make keeping track of all your 'to-do's a little more fun!


Tuesday, August 28, 2012

Back to School.


We are down to only one week before the start of school! Are you ready?

I have the school clothes pretty much taken care of and the supplies all set to bring to open house - but I still have a few more projects I need to get done this week. Specifically, I need to put together a bulletin or magnetic board to keep us all on track as we get back into the swing of a new schedule. And I also plan on making a little something for each of my kids teachers for them to bring on the first day. If you are looking for ideas for either of these types of projects, today I have some fun project ideas to share with you!

First up, a few organizer board ideas. We created this bulletin board by painting one of our 12x12 frames and swapping out the glass with a 12x12 piece of cork board. Then we embellished with pattern paper from the We R Memory Keepers Hall Pass line and even made our own pins by gluing thumb tacks to the back of metal tag embellishments that coordinated with the paper line.


If you would prefer a magnetic board, Kristine created this adorable magnet board by placing a 12x12 metal sheet into a frame. She covered the metal with pattern paper and then embellished using paper from the My Mind's Eye 6x6 School themed paper pad. She created matching magnets by using glossy accents to adhere pattern paper (from the same line) to the backside of glass tiles and then adhering magnets to the back of the paper.


Here is another take on an organizer board. This board was created on a canvas and was altered by using vinyl, chalkboard paint and pattern paper. I love the addition of the decorated clips at the bottom of the canvas!


As I mentioned it is really easy to create your own magnets by adhering pattern paper to the backside of a glass tile using glossy accents and then gluing a magnet to the back of the pattern paper. Here are a few more magnet ideas that you could use for your own magnet board, or could be given as a teacher gift as well.

For these apple magnets, we punched circles of red cardstock and glued them to the back of the glass tile. Then we hand cut the stems from brown cardstock and leaves from green pattern paper and glued them to the front.


For these magnets, it is even more simple - we just found images that fit the tiles on pattern paper and punched them out and glued them on. These would be great to use just on a refrigerator to hold school papers or special pieces that are brought home!


Next, I wanted to share a few project ideas that would be perfect to create for those special teachers on the first day of school!

We created this apple treat box, by painting one of our paper mache boxes red, and then simply gluing this wood apple onto the front (which is already cut and painted). To add a bit more decoration we cut this "Back to School" tag from a piece of pattern paper and then attached it with a piece of red and white bakers twine. This would be great to fill with some treats or a few small school supplies - or even with a batch of apple magnets I shared above!  


Another idea is to embellish and fill one of our clear tubes with something fun for the teacher. We created a few sample ideas below:


 Or you could always fill up a Mason Jar with something fun too:


And one final idea, a teacher supply box. For this project we painted this divided wood box that you can find in our Beads & Basics department and then embellished with pieces from the We R Memory Keepers Hall Pass line and some ruler ribbon. We filled it with some fun office/school supplies, but of course you could also fill it with some treats for the teacher too.


 *To see some of our school themed projects from the past and other fun ideas we found online be sure to check out our Back to School Board on Pinterest too!

Have you created any organizer boards or teacher gifts to get ready for school? I would love to share them if you have!

Thursday, August 9, 2012

Menu & Organizing Boards.

If you're anything like me, this time of year I really start wanting to get things in order around my house again. During the summer months we obviously relax a bit about routines and schedules - but with the start of school right around the corner I'm starting to get excited about getting back to a routine and having things in order.

Today I wanted to share a couple of projects that would be perfect for keeping track of notes, reminders, daily schedules and even a weekly menu!

For this first bulletin board - we actually used a standard (brown) piece of bulletin board and changed the color by spraying it with an spray ink mist. Such a creative idea! The push pins where then created by just adding a thumb tack to the back of regular scrapbooking embellishment pieces.

For this Menu Board we added a metal sheet behind the pattern paper and magnets to the embellishments to create a magnetic board. In addition, the pattern paper and letter stickers are behind a piece of glass so you can use the front as a dry erase board and easily reuse it week by week.

The same idea was used on the "This Week" board. Each day is divided out with the use of pattern paper, and the entire layout covered with glass so you can use it as a dry erase board to keep track of the schedule for the week!

Thursday, December 8, 2011

25 Days of Christmas 2011: Day 8


Day 8: Memo and Magnetic Boards

A fun way to add some practical holiday decor to your home or office is with one of our Memo or Magnetic boards. Decorated as a calendar or a holiday board they create a perfect place to keep track of your holiday events, hang Christmas cards, or display holiday photos. The best part is once you have the frame created you can easily change out the embellishments and paper to create a new look for the next month or season. Here are few that we created for December and January:


Wednesday, July 20, 2011

Dog Days of Summer: Go Twins

For all of you Twins fans today I have a few Twins themed projects. For each of these projects we used the same 'Go Twins' vinyl, but just added it to different pieces we have available here at Crafts Direct.

One we added to a glass block, decorated it with some ribbon and filled it up with peanuts to follow the baseball theme. Another we added to the same party pails I shared with you yesterday. And lastly, we added vinyl to one of our magnetic boards and decorated it with baseball magnets and some ribbon. A project sheet for the Go Twins magnetic board can be found here.


--------------------------------------------------------------------------------------
GIVEAWAY DETAILS: Our Dog Days of Summer series is going to run July 18th through July 29th. At the end of the series we will be randomly drawing a winner from the comments on the posts to win a $20 Crafts Direct gift card (to pick up supplies for their own Dog Days of Summer project!). To enter simply comment on the blog post below. You can comment on each separate blog post during the two weeks for extra chances to win too! The winner of the gift card will be announced on Monday August 1st.